The final product
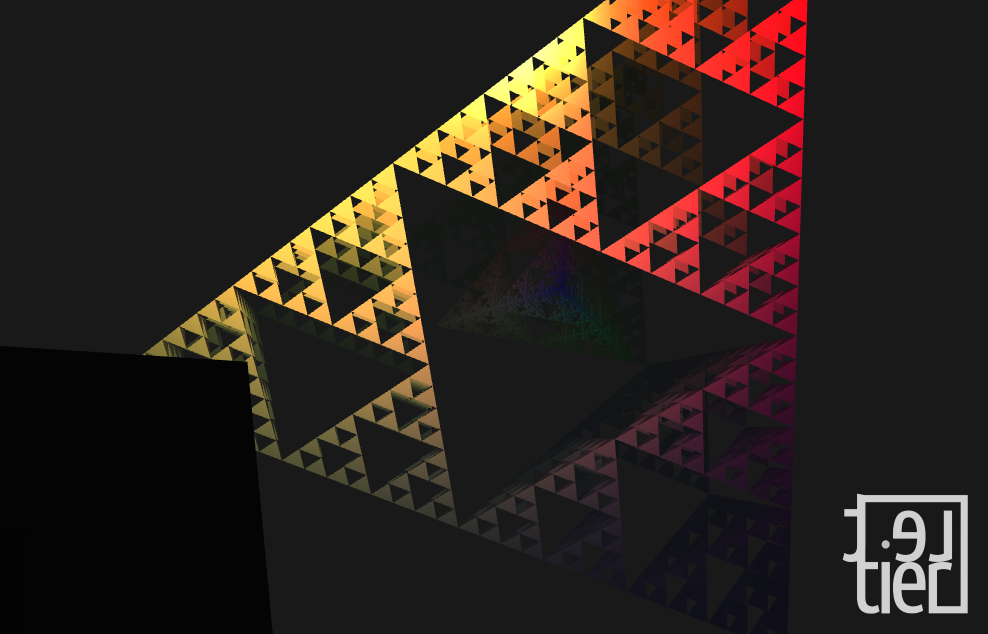
Be sure to try out the final build at lettier.com/sierpinski. Press m to start flying around with the mouse and the wasd keys. Note that you can find all of the project’s files on GitHub.
Overview
Our goal is to produce 3D rotating Sierpinski Pyramids using JavaScript and WebGL. The user will be able to control the amount of subdivisions. As an added bonus, we’ll implement a realistic lighting system to render our pyramids.
The Sierpinski tetrahedron or tetrix is the three-dimensional analogue of the Sierpinski triangle, formed by repeatedly shrinking a regular tetrahedron to one half its original height, putting together four copies of this tetrahedron with corners touching, and then repeating the process.
Boilerplate
Everything starts with the HTML canvas element. This will display each frame buffer as it is rendered.
// Create and add the canvas that will be "painted" on or rather rendered to by WebGL.

canvas        = document.createElement( "canvas" );
canvas.id     = "webgl_canvas";
canvas.width  = window.innerWidth;
canvas.height = window.innerHeight;
document.body.appendChild( canvas );
After the canvas comes the initialization of the WebGL context where we specify the view-port width and height. It is here that we test if the user’s browser supports WebGL.
function initGL( canvas ) {
  try {
    gl = canvas.getContext( "webgl" ) || canvas.getContext( "experimental-webgl" );
    gl.viewportWidth  = canvas.width;
    gl.viewportHeight = canvas.height;
  } catch ( error ) {
    // Browser cannot initialize a WebGL context.
    window.location.assign( "http://get.webgl.org/" );
  }
  if ( !gl ) {
    // Browser cannot initialize a WebGL context.
    window.location.assign( "http://get.webgl.org/" );
  }
}
Next we need to gather, compile, and link the vertex and fragment shaders that process the vertices, normals, and colors. Once the shaders are in place, we must acquire indexes to their internal data structures. These include the vertex position, normal, and color attributes as well as the projection matrix, normal matrix, and the model-view matrix. For the lighting model, we will also need the ambient color and the point light location and color.
function initShaders( ) {
 var fragmentShader = getShader( gl, "shader-fs" );
 var vertexShader   = getShader( gl, "shader-vs" );

 shaderProgram = gl.createProgram( );
 gl.attachShader( shaderProgram, vertexShader );
 gl.attachShader( shaderProgram, fragmentShader );
 gl.linkProgram( shaderProgram );

 if ( !gl.getProgramParameter( shaderProgram, gl.LINK_STATUS ) ) {
  console.error( "Could not initialize shaders." );
 }

 gl.useProgram( shaderProgram );

 // Acquire handles to shader program variables in order to pass data to the shaders.

 shaderProgram.vertexPositionAttribute = gl.getAttribLocation( shaderProgram, "aVertexPosition" );
 gl.enableVertexAttribArray( shaderProgram.vertexPositionAttribute );

 shaderProgram.vertexColorAttribute = gl.getAttribLocation( shaderProgram, "aVertexColor" );
 gl.enableVertexAttribArray( shaderProgram.vertexColorAttribute );

 shaderProgram.vertexNormalAttribute = gl.getAttribLocation( shaderProgram, "aVertexNormal" );
 gl.enableVertexAttribArray( shaderProgram.vertexNormalAttribute );

 shaderProgram.pMatrixUniform  = gl.getUniformLocation( shaderProgram, "uPMatrix"  );
 shaderProgram.mvMatrixUniform = gl.getUniformLocation( shaderProgram, "uMVMatrix" );
 shaderProgram.nMatrixUniform  = gl.getUniformLocation( shaderProgram, "uNMatrix"  );

 shaderProgram.ambientColorUniform       = gl.getUniformLocation( shaderProgram, "uAmbientColor"       );
 shaderProgram.pointLightLocationUniform = gl.getUniformLocation( shaderProgram, "uPointLightLocation" );
 shaderProgram.pointLightColorUniform    = gl.getUniformLocation( shaderProgram, "uPointLightColor"    );
}
There will be mouse and keyboard controls so we’ll need to setup event handling. Camera keys will be w, s, a, and d for forward, back, left, and right respectively. We’ll also use m to toggle on/off the moving of the camera.
// ...

window.onkeydown = function ( event ) {
  switch ( event.keyCode ) {
    case 87: // Forward W
      camera_keys[ 0 ] = 1;
      break;
    case 83: // Backward S
      camera_keys[ 1 ] = 1;
      break;
    case 65: // Left A
      camera_keys[ 2 ] = 1;
      break;
    case 68: // Right D
      camera_keys[ 3 ] = 1;
      break;
    default:
      break;
  }
};
window.onkeyup = function ( event ) {
  switch ( event.keyCode ) {
    case 87: // Forward W
      camera_keys[ 0 ] = 0;
      break;
    case 83: // Backward S
      camera_keys[ 1 ] = 0;
      break;
    case 65: // Left A
      camera_keys[ 2 ] = 0;
      break;
    case 68: // Right D
      camera_keys[ 3 ] = 0;
      break;
    case 77: // Use Controls M
      use_controls = !use_controls;
      if ( use_controls ) {
        canvas.requestPointerLock( );
        document.addEventListener( "mousemove", mouse_move, false );
        document.addEventListener( "mouseup", mouse_button_up, false );
      } else {
        document.exitPointerLock( );
        document.removeEventListener( "mousemove", mouse_move, false );
        document.removeEventListener( "mouseup", mouse_button_up, false );
      }
    default:
      break;
  }
};

// ...
The Tetrahedron
Let us begin by defining the initial tetrahedron that will be recursively subdivided by the user. Increasing or decreasing r adjusts the overall size of the pyramid. We’ll center it at the origin which makes affine transformations convenient. For a greater aesthetic, we will color the vertices. These vertex colors will be subdivided along with the pyramid.
// Dimension of the Sierpinski tetrahedron.

var r = 3;

// The main points of the Sierpinski tetrahedron.

var a = 0;
var b = r;
var c = b * Math.sqrt( 2 ) * 2.0 / 3.0;
var d = -1 * b / 3.0;
var e = -1 * b * Math.sqrt( 2 ) / 3.0;
var f = b * Math.sqrt( 2 ) / Math.sqrt( 3 );
var g = -1 * f;

var point_one   = [ a, b, a ];
var point_two   = [ c, d, a ];
var point_three = [ e, d, f ];
var point_four  = [ e, d, g ];

// Vertex colors of the four main points of the Sierpinski tetrahedron/pyramid.

var color_one   = [ 1.0, 0.0, 0.0 ];
var color_two   = [ 0.0, 1.0, 0.0 ];
var color_three = [ 0.0, 0.0, 1.0 ];
var color_four  = [ 1.0, 1.0, 1.0 ];
With the pyramid defined, we need to bind and fill the vertex, normal and color buffers. We will need the normals later on during the lighting calculations.
// Create the vertex buffer and bind it getting it ready to
// read in the vertices to the tetrahedron/pyramid.

pyramidVertexPositionBuffer = gl.createBuffer( );
gl.bindBuffer( gl.ARRAY_BUFFER, pyramidVertexPositionBuffer );

// Bind and fill the pyramid vertices.

gl.bufferData( gl.ARRAY_BUFFER, new Float32Array( vertices ), gl.STATIC_DRAW );
pyramidVertexPositionBuffer.itemSize = 3;
pyramidVertexPositionBuffer.numItems = vertices.length / 3;

// Bind and fill the pyramid vertex normals.

pyramidVertexNormalBuffer = gl.createBuffer( );
gl.bindBuffer( gl.ARRAY_BUFFER, pyramidVertexNormalBuffer );
gl.bufferData( gl.ARRAY_BUFFER, new Float32Array( vertex_normals ), gl.STATIC_DRAW );
pyramidVertexNormalBuffer.itemSize = 3;
pyramidVertexNormalBuffer.numItems = vertex_normals.length / 3;

// Bind and fill the pyramid vertex colors.

pyramidVertexColorBuffer = gl.createBuffer( );
gl.bindBuffer( gl.ARRAY_BUFFER, pyramidVertexColorBuffer );
gl.bufferData( gl.ARRAY_BUFFER, new Float32Array( vertex_colors ), gl.STATIC_DRAW );
pyramidVertexColorBuffer.itemSize = 4;
pyramidVertexColorBuffer.numItems = vertex_colors.length / 4;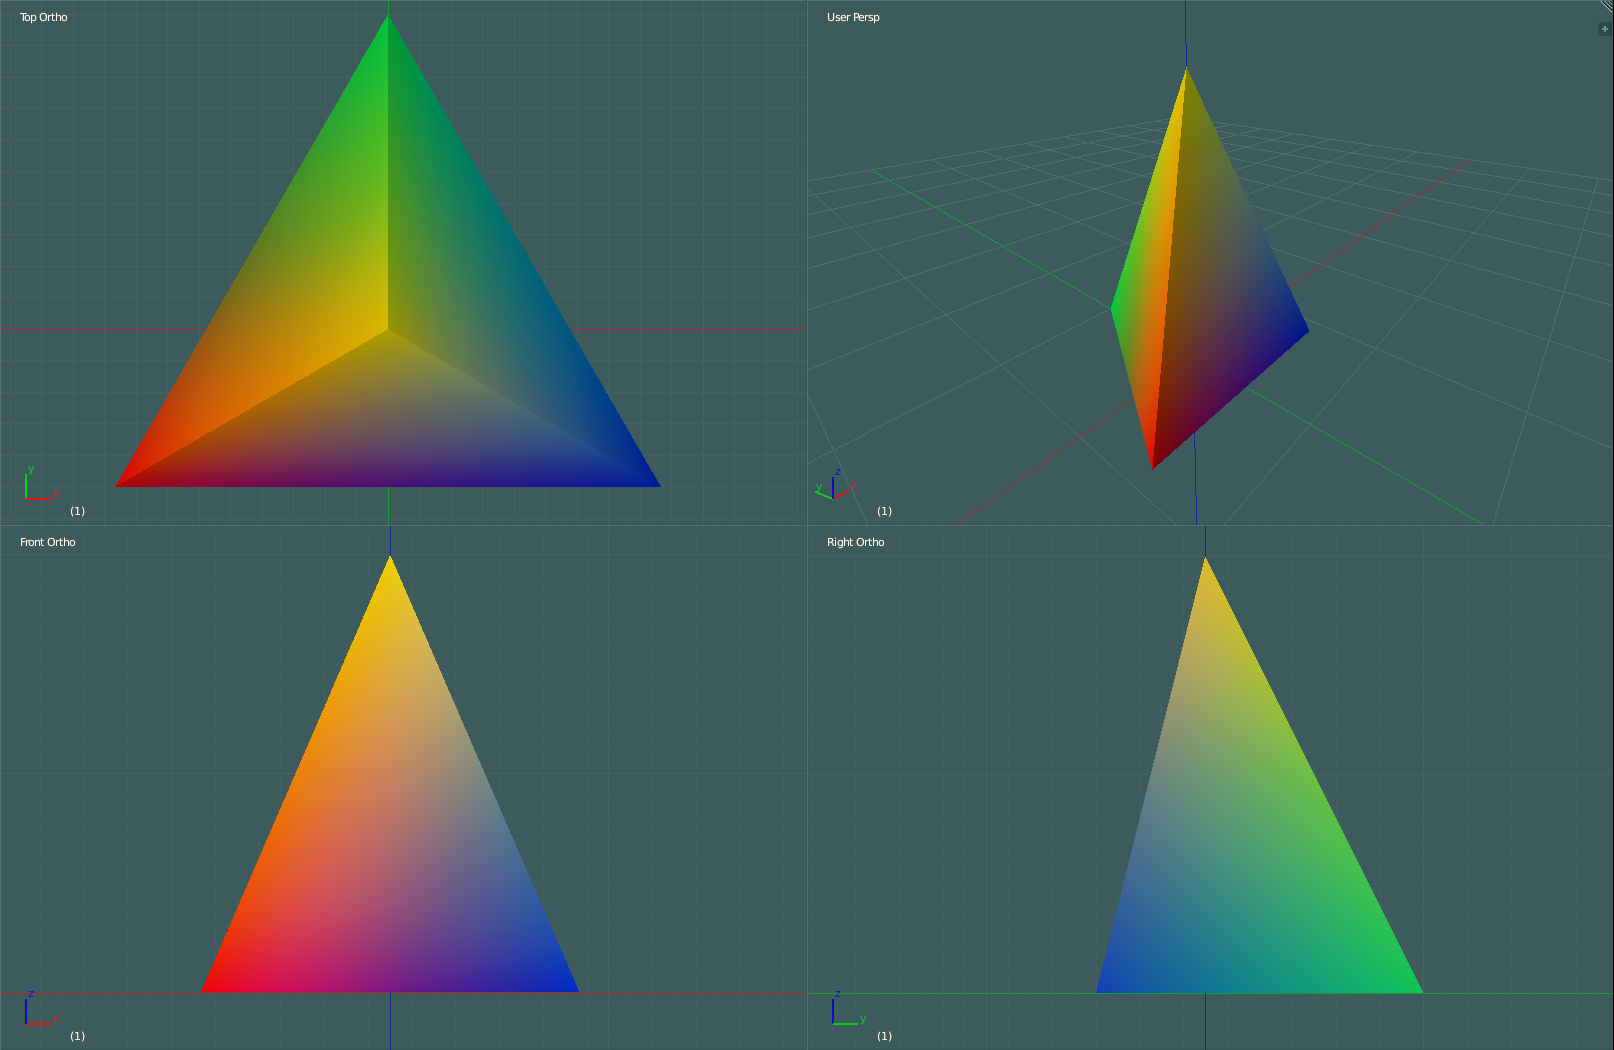
Single Tetrahedron (Pyramid)
Algorithm
The algorithm revolves around finding the midpoint. There are six midpoints we must find for each pyramid. Three for the edges leading to the pinnacle and three for the edges that form the base.
// Find the midpoints to all of the edges of this pyramid/tetrahedron.

var p1_p2 = midpoint( p1, p2 );
var p1_p3 = midpoint( p1, p3 );
var p1_p4 = midpoint( p1, p4 );
var p2_p3 = midpoint( p2, p3 );
var p2_p4 = midpoint( p2, p4 );
var p3_p4 = midpoint( p3, p4 );
Six Midpoints
There are an additional six midpoints to find for the four colors (one for each vertex making up the pyramid).
// Subdivide the vertex colors as well--similar to subdividing the edges.

var c1_c2 = midpoint( c1, c2 );
var c1_c3 = midpoint( c1, c3 );
var c1_c4 = midpoint( c1, c4 );
var c2_c3 = midpoint( c2, c3 );
var c2_c4 = midpoint( c2, c4 );
var c3_c4 = midpoint( c3, c4 );
Once the midpoints are found, we recursively call divide_tetrahedron for each new set of four points and colors. There are a total of four sets of four points and four colors. In other words, before subdivision we have four triangles and afterwards we have 16 making up the four new pyramids. One pyramid is located on top with three located on the bottom.
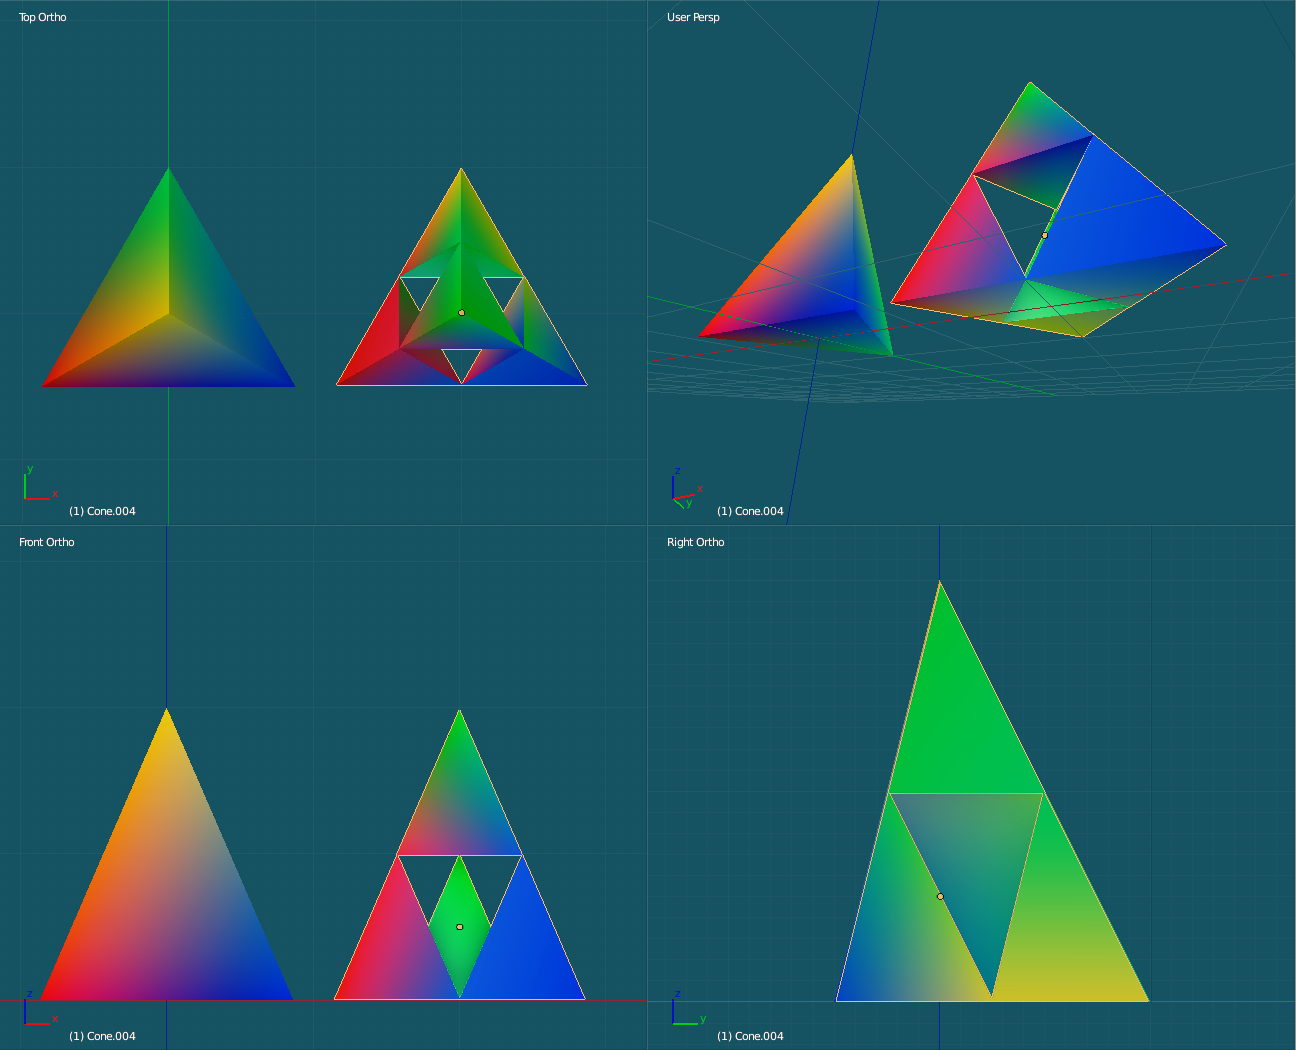
Four New Pyramids
For more subdivisions, we’ll recursively call divide_tetrahedron on each of the four pyramids. We can do this as many times as our machine hardware will allow for but we’ll cap the subdivisions at seven.
// ...

  up_button.onclick = function ( )
  {
    if ( subdivide_count === 7 ) {
      subdivide_count = 7;
    }  else {
      subdivide_count += 1;
      document.getElementById( "subdivision_text_box" ).innerHTML = "Subdivision: " + subdivide_count;
      initBuffers( );
    }
  };

// ...

function divide_tetrahedron( p1, p2, p3, p4, c1, c2, c3, c4, count, smooth ) {
  // ...

  if (count > 0) {
    divide_tetrahedron( p1,    p1_p2, p1_p3, p1_p4, c1,    c1_c2, c1_c3, c1_c4, count - 1, smooth );
    divide_tetrahedron( p1_p2, p2,    p2_p3, p2_p4, c1_c2, c2,    c2_c3, c2_c4, count - 1, smooth );
    divide_tetrahedron( p1_p3, p2_p3, p3,    p3_p4, c1_c3, c2_c3, c3,    c3_c4, count - 1, smooth );
    divide_tetrahedron( p1_p4, p2_p4, p3_p4, p4,    c1_c4, c2_c4, c3_c4, c4,    count - 1, smooth );
  } else {
    // No more subdivision, so assemble this tetrahedron/pyramid.
    // The recursive base case.

    tetrahedron( p1, p2, p3, p4, c1, c2, c3, c4, smooth );
  }
}

// ...

divide_tetrahedron(
  point_one,
  point_two,
  point_three,
  point_four,
  color_one,
  color_two,
  color_three,
  color_four,
  subdivide_count,
  false
);
As we move up the stack of recursion, if we have completed all counts of subdivision, we’ll assemble the pyramid using the four new points and colors and then move back down the stack.
function tetrahedron( p1, p2, p3, p4, c1, c2, c3, c4, smooth ) {
  var fN1 = triangle( p1, p2, p3, c1, c2, c3, smooth ); // Front face.
  var fN2 = triangle( p1, p4, p2, c1, c2, c4, smooth ); // Right face.
  var fN3 = triangle( p1, p3, p4, c1, c3, c4, smooth ); // Left face.
  var fN4 = triangle( p2, p4, p3, c2, c3, c4, smooth ); // Bottom face.

  // Compute and add the vertex normals using the face normals returned.
  // These vertex normals will be used for the lighting calculations
  // making for a smooth appearance.

  if ( smooth === true ) {
    // Compute in counter-clockwise order since the vertices
    // were added in counter-clockwise order.

    weighted_vertex_normal( p3, fN1, fN3, fN4 );
    weighted_vertex_normal( p2, fN1, fN4, fN2 );
    weighted_vertex_normal( p1, fN1, fN2, fN3 );

    weighted_vertex_normal( p2, fN1, fN4, fN2 );
    weighted_vertex_normal( p4, fN2, fN4, fN3 );
    weighted_vertex_normal( p1, fN1, fN2, fN3 );

    weighted_vertex_normal( p4, fN2, fN4, fN3 );
    weighted_vertex_normal( p3, fN1, fN3, fN4 );
    weighted_vertex_normal( p1, fN1, fN2, fN3 );

    weighted_vertex_normal( p3, fN1, fN3, fN4 );
    weighted_vertex_normal( p4, fN2, fN4, fN3 );
    weighted_vertex_normal( p2, fN1, fN4, fN2 );
  }
}
It is in the triangle function that we build up the pyramid buffers getting them ready to be shipped off to the GPU.
function triangle( p1, p2, p3, c1, c2, c3, smooth ) {
  // Push the vertices to this triangle in counter-clockwise order.
  //
  //    1.....4
  //   . .   . .
  //  .   . .   .
  // 3.....2.....5
  //
  // 1 then 2 then 3 would be clockwise order.
  // 3 then 2 then 1 would be counter-closewise order.

  // WebGL default for the front of the face of the triangle is counter-clockwise order.
  // Thus push 3, 2, and then 1 in that order.

  vertices.push( p3[ 0 ] ); vertices.push( p3[ 1 ] ); vertices.push( p3[ 2 ] );
  vertices.push( p2[ 0 ] ); vertices.push( p2[ 1 ] ); vertices.push( p2[ 2 ] );
  vertices.push( p1[ 0 ] ); vertices.push( p1[ 1 ] ); vertices.push( p1[ 2 ] );

  // Push the vertex colors for this triangle face.

  vertex_colors.push( c3[ 0 ] ); vertex_colors.push( c3[ 1 ] ); vertex_colors.push( c3[ 2 ] ); vertex_colors.push( 1.0 );
  vertex_colors.push( c2[ 0 ] ); vertex_colors.push( c2[ 1 ] ); vertex_colors.push( c2[ 2 ] ); vertex_colors.push( 1.0 );
  vertex_colors.push( c1[ 0 ] ); vertex_colors.push( c1[ 1 ] ); vertex_colors.push( c1[ 2 ] ); vertex_colors.push( 1.0 );

  // Compute this triangle face's face normal for use in the lighting calculations.

  var triangle_side_u = [ p2[ 0 ] - p1[ 0 ], p2[ 1 ] - p1[ 1 ], p2[ 2 ] - p1[ 2 ] ];
  var triangle_side_v = [ p3[ 0 ] - p1[ 0 ], p3[ 1 ] - p1[ 1 ], p3[ 2 ] - p1[ 2 ] ];

  // Cross product N = U x V where U = <x1,y1,z1> and V = <x2,y2,z2>.

  // Nx = ( z1 * y2 ) - ( y1 * z2 )
  // Ny = ( x1 * z2 ) - ( z1 * x2 )
  // Nz = ( y1 * x2 ) - ( x1 * y2 )

  var face_normal_x = ( triangle_side_u[ 2 ] * triangle_side_v[ 1 ] ) - ( triangle_side_u[ 1 ] * triangle_side_v[ 2 ] );
  var face_normal_y = ( triangle_side_u[ 0 ] * triangle_side_v[ 2 ] ) - ( triangle_side_u[ 2 ] * triangle_side_v[ 0 ] );
  var face_normal_z = ( triangle_side_u[ 1 ] * triangle_side_v[ 0 ] ) - ( triangle_side_u[ 0 ] * triangle_side_v[ 1 ] );

  var length = Math.sqrt( ( face_normal_x * face_normal_x ) + ( face_normal_y * face_normal_y ) + ( face_normal_z * face_normal_z ) );

  // Normalize this face normal.

  if ( length != 0.0 ) {
    face_normal_x = face_normal_x / length;
    face_normal_y = face_normal_y / length;
    face_normal_z = face_normal_z / length;
  }

  // Use the face normal of this triangle face as the vertex normal for all of the vertex normals
  // that make up this triangle face. These vertex normals will be used in the lighting calculations.
  // Instead, to compute the vertex normals, you could average all of the face normals that are adjacent
  // to a particular vertex as the vertex normal. This would provide a smooth surface appearance.

  if ( smooth === false ) {
    vertex_normals.push( face_normal_x ); vertex_normals.push( face_normal_y ); vertex_normals.push( face_normal_z );
    vertex_normals.push( face_normal_x ); vertex_normals.push( face_normal_y ); vertex_normals.push( face_normal_z );
    vertex_normals.push( face_normal_x ); vertex_normals.push( face_normal_y ); vertex_normals.push( face_normal_z );
  }

  // Return the face normal to later compute the average of all the face normals that are adjacent to a particular vertex.

  return [ face_normal_x, face_normal_y, face_normal_z ];
}
To recap, we start with one pyramid. We then subdivide it into 4, 16, 64, …, 4count pyramids based on the user’s selected subdivision amount > 0. Once count is 0, the recursion is complete and we then push the new vertices, colors, and normals to their appropriate buffers.
Camera System
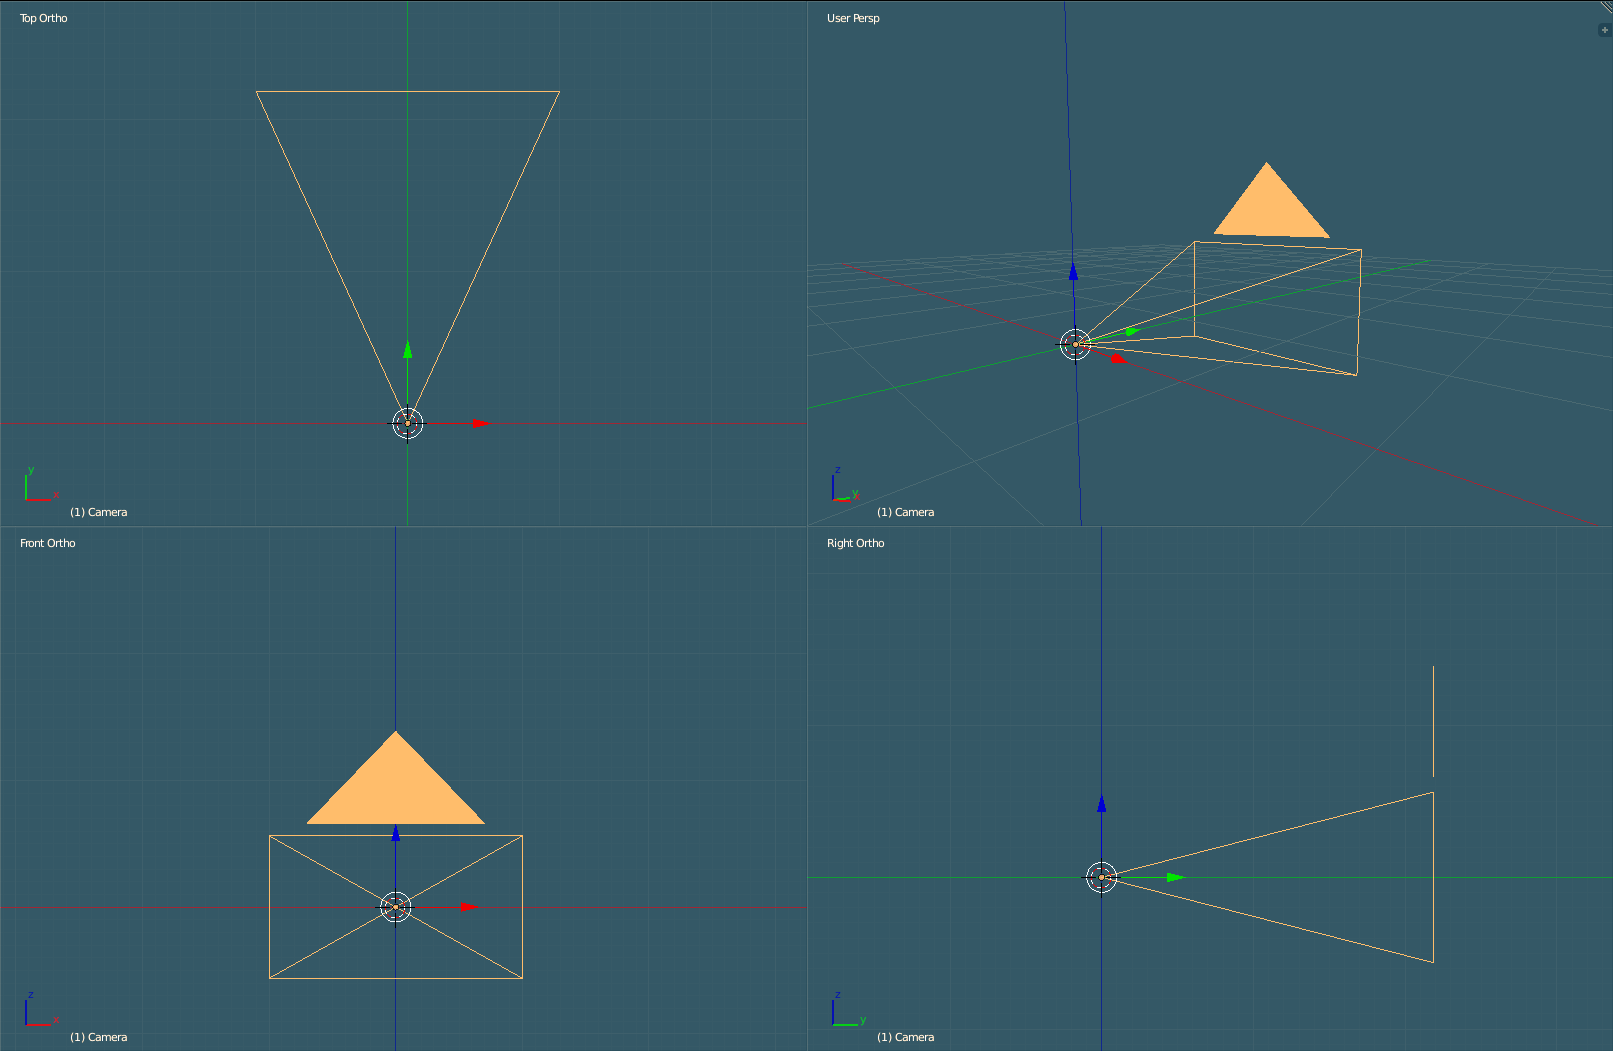
Camera system with up, side and direction vectors.
Below are the system globals pertaining to the camera system. The camera is defined by four vectors: position, direction, up and sideways. The original direction vector is used to reset the calculations before performing pitch and yaw. camera_keys hold the current state of what keys are being pressed for the translation calculations. camera_pitch involves the up and down angle of rotation while camera_yaw involves the side-to-side angle rotation.
// Camera controls.

var use_controls = false;

var camera_position_vector           = vec3.set( vec3.create( ), 0, 0.9, 0 );
var original_camera_direction_vector = vec3.set( vec3.create( ), 1,   0, 0 );
var camera_up_vector                 = vec3.set( vec3.create( ), 0,   1, 0 );

var camera_direction_vector          = vec3.clone( original_camera_direction_vector );
var camera_sideways_vector           = vec3.cross( vec3.create( ), camera_direction_vector, camera_up_vector );

var camera_pitch = 0.0;
var camera_yaw   = 0.0;

//        W,    S,    A,     D
//  Forward, Back, Left, Right
// Index: 0     1     2      3

var camera_keys = [ 0, 0, 0, 0 ];
Unlike native applications, we will need to acquire a lock on the mouse pointer.
The Pointer Lock API (formerly called Mouse Lock API) provides input methods based on the movement of the mouse over time (i.e., deltas), not just the absolute position of the mouse cursor in the viewport. It gives you access to raw mouse movement, locks the target of mouse events to a single element, eliminates limits on how far mouse movement can go in a single direction, and removes the cursor from view. It is ideal for first person 3D games, for example.
// The following is for locking the mouse pointer if possible.
// The mouse pointer lock API is not available in all browsers.

function pointer_lock_change( )
{
  if ( document.pointerLockElement       === canvas ||
       document.mozPointerLockElement    === canvas ||
       document.webkitPointerLockElement === canvas    ) {
    acquired_pointer_lock = true;
  } else {
    acquired_pointer_lock = false;
  }
}
Changing the camera based on immediate mouse events makes for a jittery experience. We’ll collect up the individual mouse movements and take the average come time to change the camera. This makes for a smooth experience.
// Gather up the changes in the mouse-x and mouse-y dimensions when the user moves the mouse.

function mouse_move( event ) {
  if ( !acquired_pointer_lock ) {
    var mouse_x_delta = event.clientX - previous_mouse_coordinates[ 0 ];
    var mouse_y_delta = event.clientY - previous_mouse_coordinates[ 1 ];

    previous_mouse_coordinates[ 0 ] = event.clientX;
    previous_mouse_coordinates[ 1 ] = event.clientY;

    if ( mouse_x_deltas.length <= max_mouse_x_deltas ) mouse_x_deltas.push( mouse_x_delta );
    if ( mouse_y_deltas.length <= max_mouse_y_deltas ) mouse_y_deltas.push( mouse_y_delta );
  } else if ( acquired_pointer_lock ) {
    var mouse_x_delta = event.movementX       ||
                        event.mozMovementX    ||
                        event.webkitMovementX ||
                        0;

    var mouse_y_delta = event.movementY       ||
                        event.mozMovementY    ||
                        event.webkitMovementY ||
                        0;

    previous_mouse_coordinates[ 0 ] = event.clientX - mouse_x_delta;
    previous_mouse_coordinates[ 1 ] = event.clientY - mouse_y_delta;

    if ( mouse_x_deltas.length <= max_mouse_x_deltas ) mouse_x_deltas.push( mouse_x_delta );
    if ( mouse_y_deltas.length <= max_mouse_y_deltas ) mouse_y_deltas.push( mouse_y_delta );
  }
}
To calculate the yaw and pitch angles, we’ll first average the changes in the mouse movements. We will treat this average as a scalar or “degrees” and convert to radians. The 0.35 constant was found through trial-and-error and serves to dampen the rotation. Next, we’ll wrap these values after 360 degrees. For example, 450 degrees becomes 90 degrees. So that they cannot completely rotate the pitch around, we’ll limit the pitch angle to !(45 < x < 315) or 0 <= x <= 45 and 315 <= x <= 360. Last, we will remove the first elements from the mouse movement differences. This will keep a stable window as we compute the moving average.
// Calculate the camera yaw and pitch angles.

camera_yaw    += -( get_average( mouse_x_deltas ) * ( Math.PI / 180.0 ) ) * 0.35;
camera_pitch  += -( get_average( mouse_y_deltas ) * ( Math.PI / 180.0 ) ) * 0.35;

// Wrap the angles.

camera_yaw   = get_remainder( camera_yaw,   Math.PI * 2 );
camera_pitch = get_remainder( camera_pitch, Math.PI * 2 );

// Limit the pitch angle.

if ( camera_pitch <= ( 180 * ( Math.PI / 180 ) ) && camera_pitch >= ( 45 * ( Math.PI / 180 ) ) ) {
  camera_pitch = 45 * ( Math.PI / 180 );
}

if ( camera_pitch <= ( 315 * ( Math.PI / 180 ) ) && camera_pitch > ( 180 * ( Math.PI / 180 ) ) ) {
  camera_pitch = 315 * ( Math.PI / 180 );
}

// Remove the first elements from the mouse delta buffers.

mouse_x_deltas.shift( );
mouse_y_deltas.shift( );
With the angles ready, we will first perform yaw. We rotate the original_camera_direction_vector by the yaw angle with the result being the camera_direction_vector. Before performing pitch, we normalize the camera_direction_vector making it a unit vector pointing in the same direction as it was pointing before normalization. Taking the cross product of the camera_direction_vector and the camera_up_vector yields us our camera_sideways_vector. Now we rotate the camera_direction_vector by the pitch angle using the camera_sideways_vector. Imagine holding the camera_sideways_vector as you would a motorcycle throttle. Rolling back or forth on the throttle pitches the camera up or down.
// Perform yaw.

vec3.transformMat4(
  camera_direction_vector,
  original_camera_direction_vector,
  mat4.rotate( mat4.create( ), mat4.identity( mat4.create( ) ), camera_yaw, camera_up_vector )
);

camera_direction_vector = vec3.normalize( camera_direction_vector, camera_direction_vector );

// Perform pitch.

camera_sideways_vector = vec3.cross( vec3.create( ), camera_direction_vector, camera_up_vector );

vec3.transformMat4(
  camera_direction_vector,
  camera_direction_vector,
  mat4.rotate( mat4.create( ), mat4.identity( mat4.create( ) ), camera_pitch, camera_sideways_vector )
);

camera_direction_vector = vec3.normalize( camera_direction_vector, camera_direction_vector );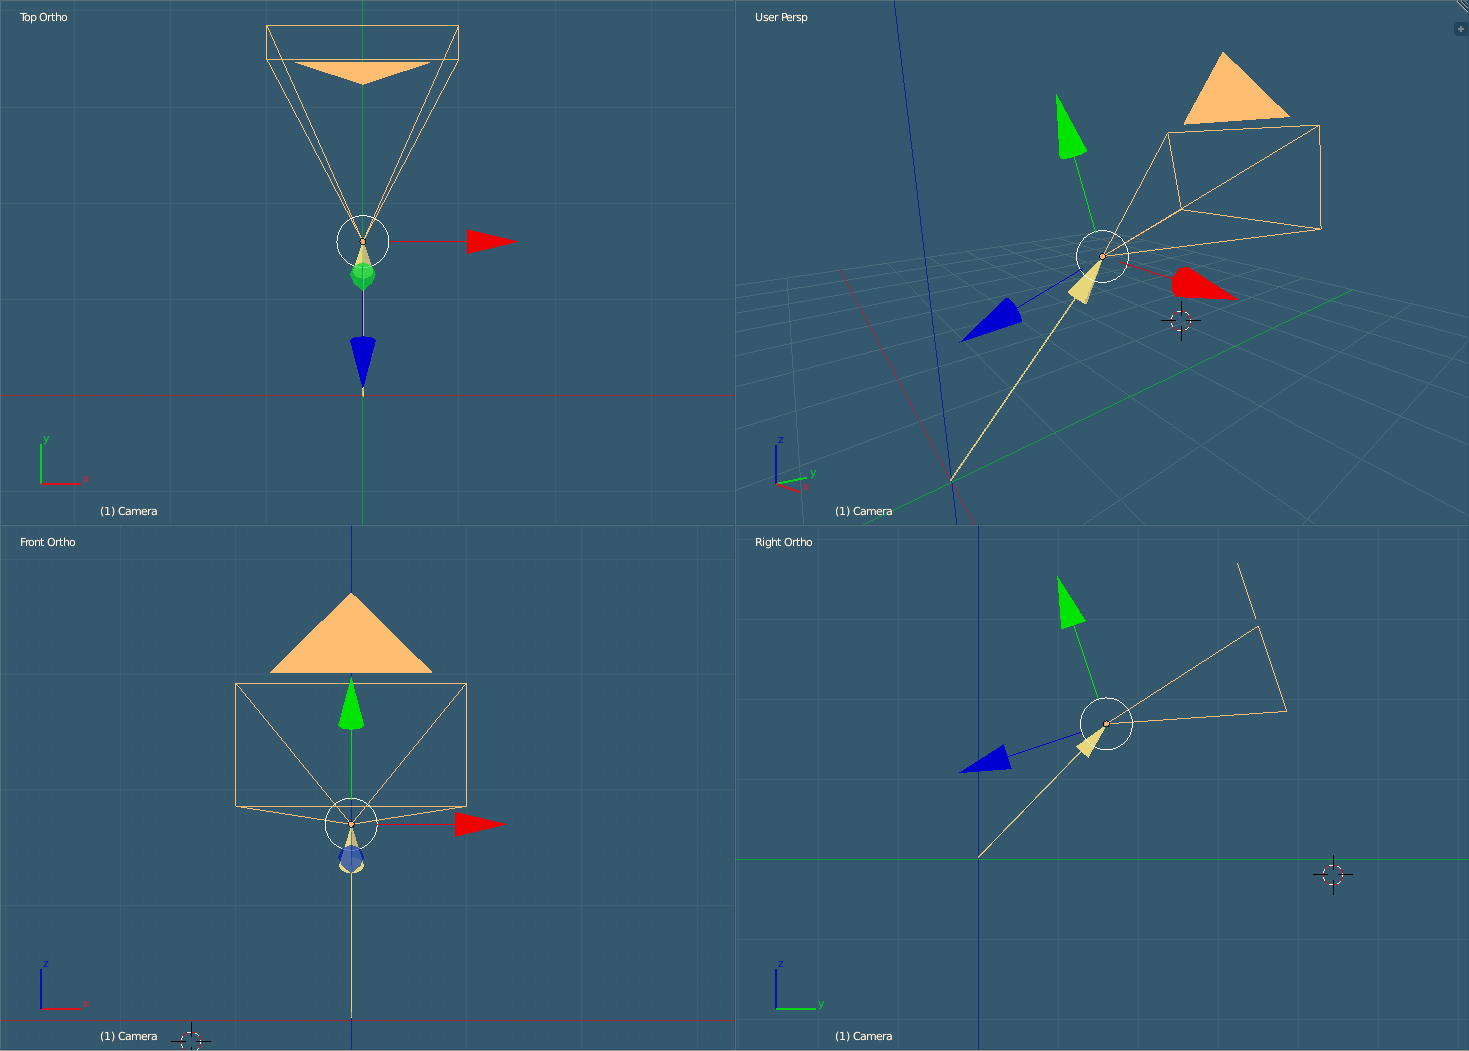
Camera vectors. Red sideways, blue direction, green up and yellow position.
Lighting System
For a more realistic scene, we will use per fragment lighting. Stated earlier, we need to acquire the ambient, location, and color fragment shader variable indexes for our single point light in our scene. Our lighting model will be the Phong Reflection Model.
shaderProgram.ambientColorUniform       = gl.getUniformLocation( shaderProgram, "uAmbientColor"       );
shaderProgram.pointLightLocationUniform = gl.getUniformLocation( shaderProgram, "uPointLightLocation" );
shaderProgram.pointLightColorUniform    = gl.getUniformLocation( shaderProgram, "uPointLightColor"    );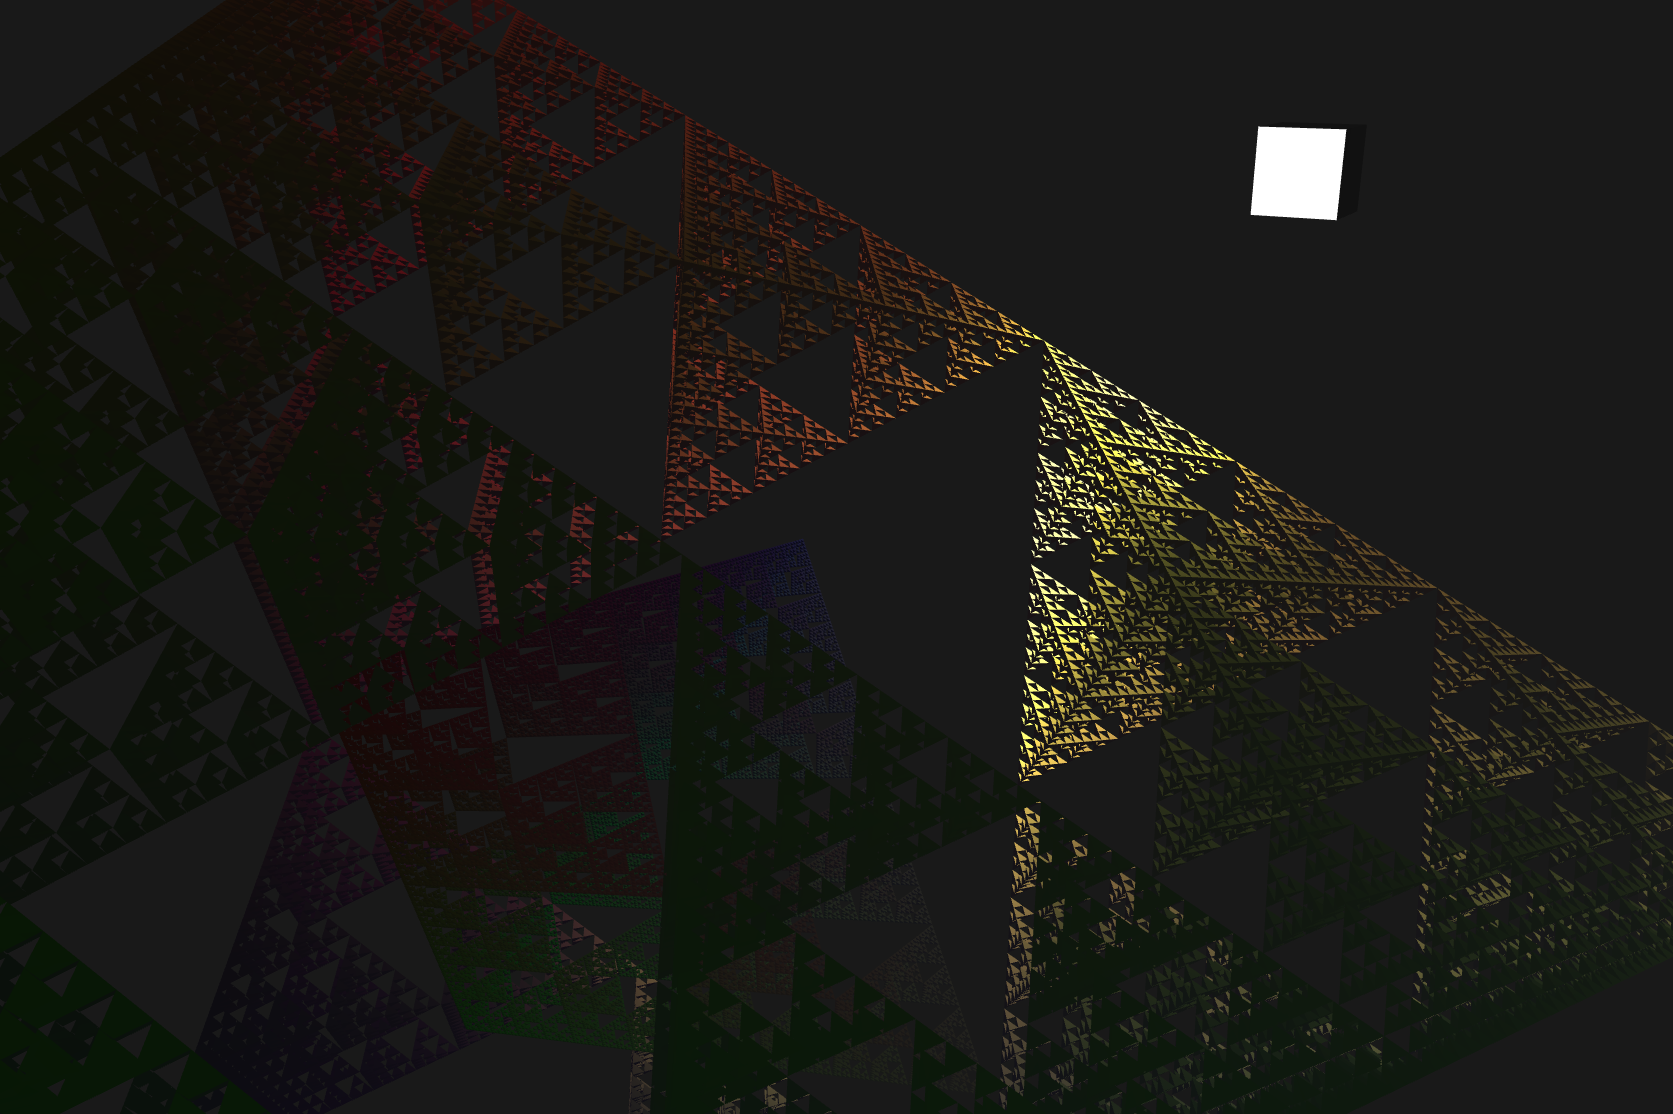
Point light illuminating the Sierpinski Pyramids.
With the indexes in hand, we can pass the needed information to the fragment shader.
// Translate the light's position based on the view matrix.

var light_position_vector = vec3.set( vec3.create( ), -4.2, 1.0, 0.0 );
vec3.transformMat4( light_position_vector, light_position_vector, view_matrix );

// Pass the shaders the light information.

gl.uniform3f( shaderProgram.ambientColorUniform,        0.1, 0.1,  0.1 );

gl.uniform3f(
  shaderProgram.pointLightLocationUniform,
  light_position_vector[ 0 ],
  light_position_vector[ 1 ],
  light_position_vector[ 2 ]
);

gl.uniform3f( shaderProgram.pointLightColorUniform,     9.0, 9.0,  3.0 );
All of the lighting calculations take place in the fragment shader.
Let us get the boilerplate out of the way.
// Fragment shader GLSL code.

var fragment_shader = document.createElement( "script" );
fragment_shader.id = "shader-fs";
fragment_shader.type = "x-shader/x-fragment";
fragment_shader.innerHTML   = "precision mediump float;";
fragment_shader.innerHTML  += "uniform vec3 uAmbientColor;";
fragment_shader.innerHTML  += "uniform vec3 uPointLightLocation;";
fragment_shader.innerHTML  += "uniform vec3 uPointLightColor;";
fragment_shader.innerHTML  += "varying vec3 vTransformedNormal;";
fragment_shader.innerHTML  += "varying vec4 vPosition;";
fragment_shader.innerHTML  += "varying vec4 vDiffuseColor;";
fragment_shader.innerHTML  += "void main( void ) {";
We will need the light and eye direction vectors that point to the point light and camera respectively.
fragment_shader.innerHTML  += "   vec3 light_direction  =  normalize( uPointLightLocation - vPosition.xyz );";
fragment_shader.innerHTML  += "   vec3 eye_direction    = -normalize( vPosition.xyz );";
The surface normal is needed and depending on the fragments orientation, we will need to either negate or not negate the normalized surface vector.
// WebGL default for the front of the face of the triangle is counter-clockwise order.

fragment_shader.innerHTML  += "   vec3 surface_normal;";
fragment_shader.innerHTML  += "   if ( gl_FrontFacing ) {";
fragment_shader.innerHTML  += "        surface_normal =  normalize( vTransformedNormal );";
fragment_shader.innerHTML  += "   }";
fragment_shader.innerHTML  += "   else {";
fragment_shader.innerHTML  += "        surface_normal = -normalize( vTransformedNormal );";
fragment_shader.innerHTML  += "   }";
The intensity of the light for this fragment is the max of either the dot product between the surface normal and light direction or zero. If the light direction vector completely shadows the surface normal, the intensity will be at its brightest. Instead of it being the same intensity all over we will attenuate based on a constant outer and inner radius as well as the distance from the fragment to the light source. The attenuation will create a gradient of intensity as you move from the inner radius to the outer radius.
fragment_shader.innerHTML  += "   float light_intensity =  max( dot( surface_normal, light_direction ), 0.0 );";
fragment_shader.innerHTML  += "   float light_outer_radius = 5.0;";
fragment_shader.innerHTML  += "   float light_inner_radius = 0.0;";
fragment_shader.innerHTML  += "   float light_distance  = length( vPosition.xyz - uPointLightLocation );";
fragment_shader.innerHTML  += "   float attenuation     = 1.0 - smoothstep( light_inner_radius, light_outer_radius, light_distance );";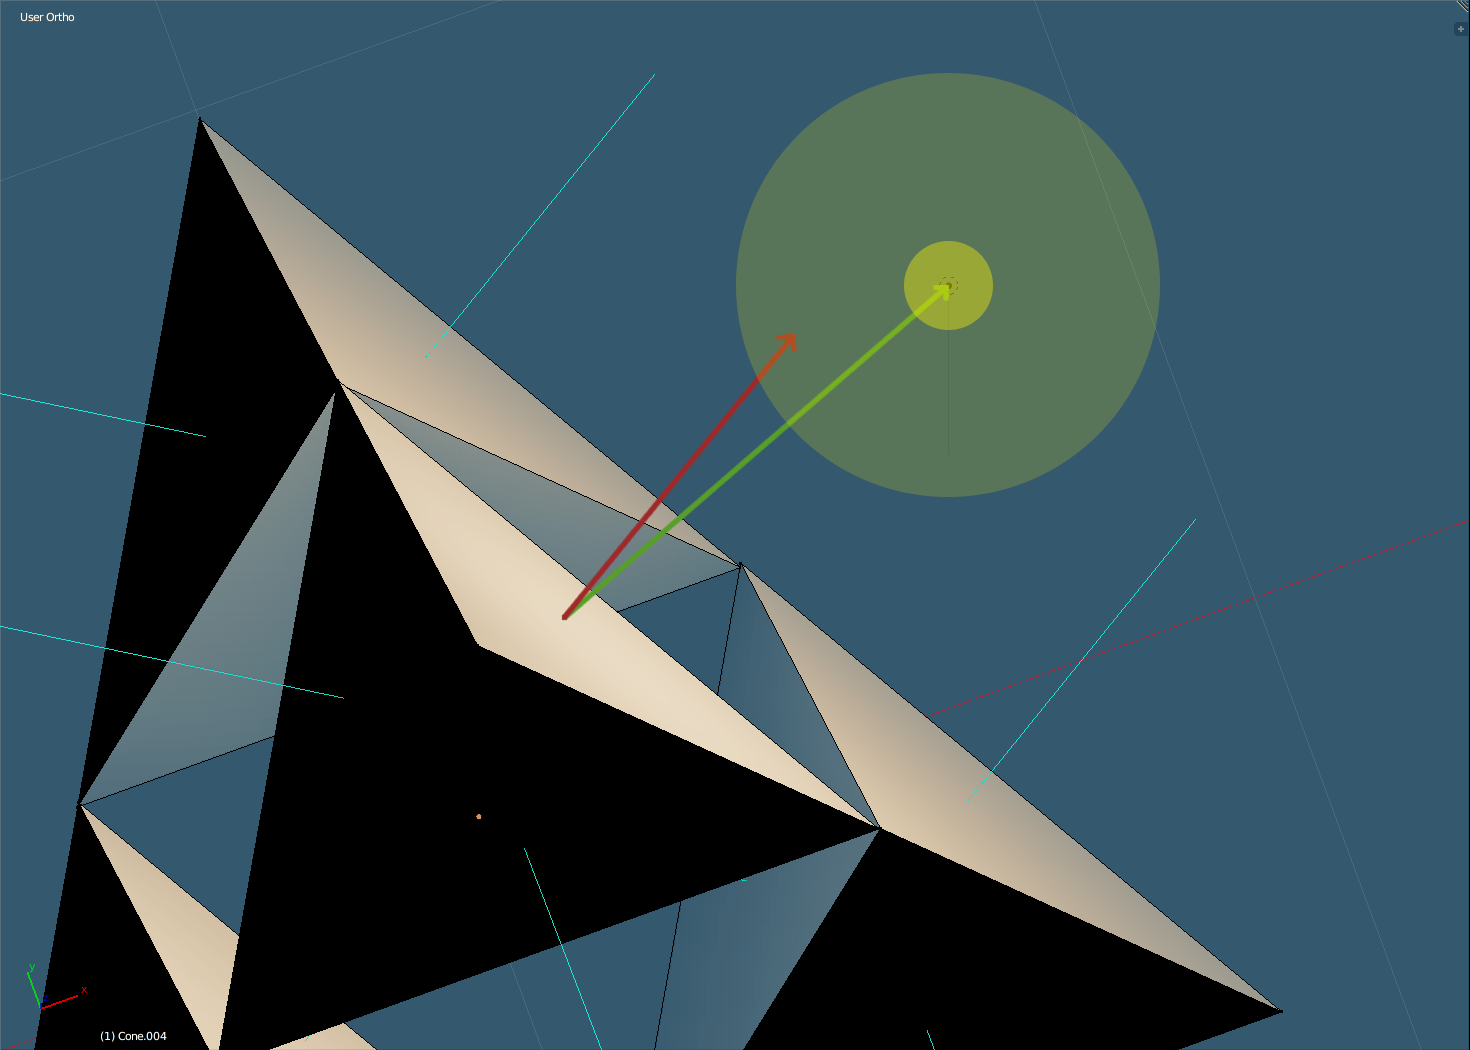
Surface normal versus the light direction vector. Outer versus inner radius.
With the scalars defined, we can now calculate the ambient, diffuse and specular lights. The ambient color is the easiest as it is the surface color times the default color for any surface regardless of a light source. The diffuse color is the surface color times the color of the light times the light intensity. If the light_intensity > 0, we calculate the specular highlight based on the dot product between the reflection of the light direction about the surface normal and the eye direction vector. We then raise this scalar product to the power of 50. All of this is then colored by the color of the point light. The specular highlight is the most intense when the reflection is in the same direction as the eye. Finishing the lighting model, we set the final color to be the sum of the ambient, diffuse and specular colors.
fragment_shader.innerHTML  += "   vec3 ambient       = vDiffuseColor.rgb * uAmbientColor;";
fragment_shader.innerHTML  += "   vec3 diffuse       = vDiffuseColor.rgb * uPointLightColor * light_intensity;";
fragment_shader.innerHTML  += "   vec3 specular      = vec3( 0.0, 0.0, 0.0 );";
fragment_shader.innerHTML  += "   if ( light_intensity > 0.0 )";
fragment_shader.innerHTML  += "     specular         = uPointLightColor * pow( max( dot( reflect( -light_direction, surface_normal ), eye_direction ), 0.0 ), 50.0 );";
fragment_shader.innerHTML  += "   diffuse            = attenuation * diffuse;";
fragment_shader.innerHTML  += "   specular           = attenuation * specular;";
fragment_shader.innerHTML  += "   vec4 final_color   = vec4( ambient + diffuse + specular, 1.0 );";
We could almost stop here but we will add attenuated fog for even more realism. As the distance from the camera to the fragment increases, so does the fog factor. Picture standing on a misty road during the night with a street lamp. As you look out in the distance, the light fades and the mist takes over.
fragment_shader.innerHTML  += "   float fog_coord    = ( gl_FragCoord.z / gl_FragCoord.w ) / 500.0;";
fragment_shader.innerHTML  += "   float fog_density  = 50.0;";
fragment_shader.innerHTML  += "   float fog          = fog_coord * fog_density;";
fragment_shader.innerHTML  += "   vec4  fog_color    = vec4( 0.1, 0.1, 0.1, 1.0 );";
fragment_shader.innerHTML  += "   float fog_factor   = clamp( 1.0 - fog, 0.0, 1.0 );";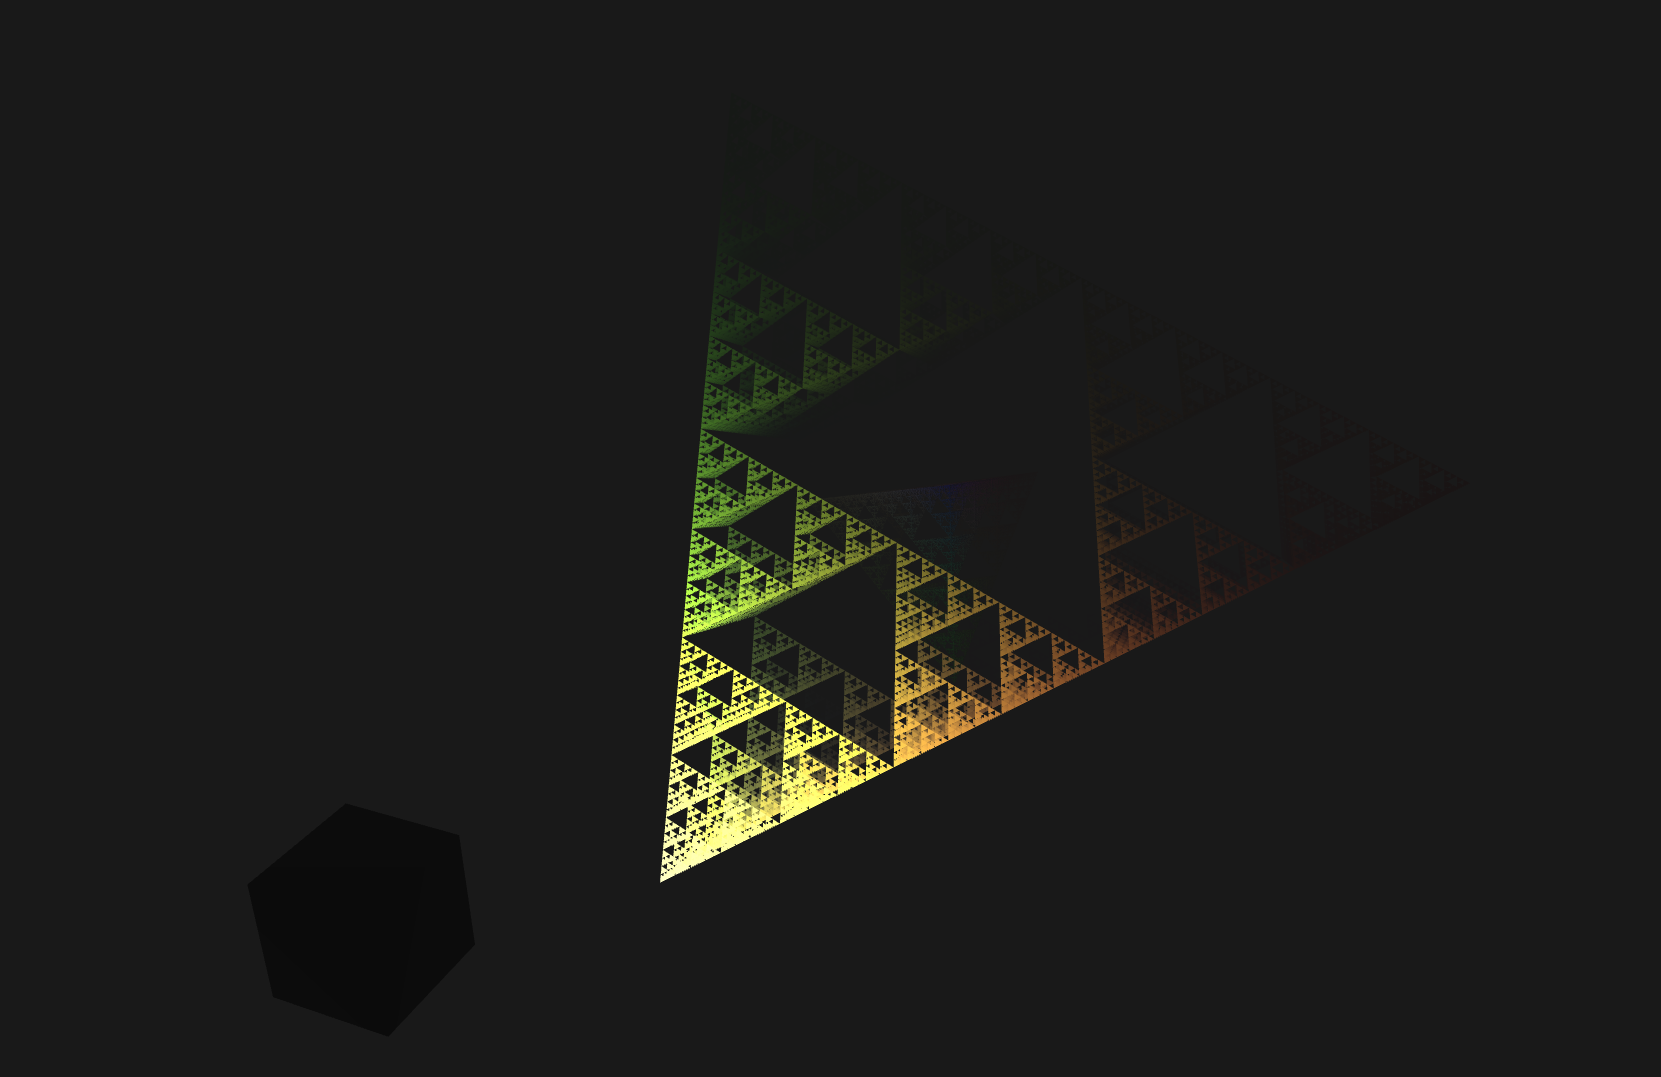
The fog eventually encompassing the pyramid.
We complete the lighting system with the calculation of the fragment color. Depending on the fog_factor, the fragment color could be the final color, a mixture of the final color and the fog color, or the fog color completely.
fragment_shader.innerHTML  += "   gl_FragColor = mix( fog_color, final_color, vec4( fog_factor, fog_factor, fog_factor, fog_factor ) );";
fragment_shader.innerHTML  += "}";
Recap
We defined the HTML canvas and WebGL context. The shaders were loaded and indexes to their variables were gathered. Camera controls were defined and event handling was set in place. The user can pitch and yaw the camera allowing them to look around the scene. Per frame, we rendered the Sierpinski Pyramids subdivided based on the user’s selection. For added realism, we used the Phong Reflection Model for lighting and employed attenuated fog.
If this project interested you, be sure to take a look at Isosurface extraction using Marching Cubes and pure WebGL.